Judul : Stripey Spring Rug Instructions
link : Stripey Spring Rug Instructions
Stripey Spring Rug Instructions
I tried to sit down and write the instructions for the mats...which are really easy. I haven't finished the monophony yet, but I've already finished the striping.
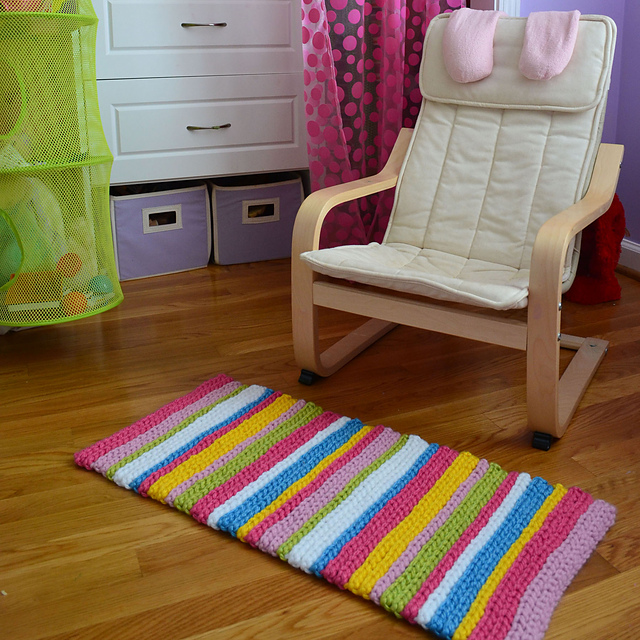
It turned out to be smaller than I initially thought, but it's so easy to make another, larger one.
It is done with all slip stitches. I love the look of the slip stitches. It gives you a knitted look. The best thing about slip stitches with a crochet hook is the thickness it creates.
materials
Super bulky yarn (6 weight) (I used Lion Brand Hometown USA)
hook size S
thread the needle
Middle
length
length
model
Note: Be sure to only work the bottom buttonhole on each stitch.
part 33
Row 1: SS in each vp, rotation. (32°)
Row 2: 1 st, pass yarn behind eyelet just behind each crossing yarn, turn (32 inches)
Rows 3-87: Repeat row 2 in color order.

color order
Light pink 4 lines
Light pink 4 lines
2 yellow lines
4 blue lines
White 2 rows
Light pink 2 lines
Green 4 lines
2 light pink lines
Yellow 4 lines
Light pink 4 lines
2 blue lines
White 4 rows
Green 2 lines
Light pink 4 lines
Light pink 2 rows
2 yellow lines
4 blue lines
White 2 rows
Light pink 4 lines
Green 4 lines
2 light pink lines
Yellow 4 lines
Light pink 2 lines
2 blue lines
White 4 rows
Green 2 lines
Light pink 4 lines
Light pink 5 lines
Take a yarn needle and carefully weave all these ends. With SL stitches, it's a bit more difficult to hide these ends.
If you need a wider rug, start with more warp yarns...like 40 or 45 instead of 33. If you want your rug longer, add more rows.
I like the back... it looks interesting

Have fun and have a great week!
Demikianlah Artikel Stripey Spring Rug Instructions
Sekianlah artikel Stripey Spring Rug Instructions kali ini, mudah-mudahan bisa memberi manfaat untuk anda semua. baiklah, sampai jumpa di postingan artikel lainnya.
Anda sekarang membaca artikel Stripey Spring Rug Instructions dengan alamat link https://crochet-info97.blogspot.com/2022/05/stripey-spring-rug-instructions_12.html


0 Response to "Stripey Spring Rug Instructions"
Post a Comment